Last Friday I visited a Make-It Show. I was looking for some new papers and doily dies. Unfortunately there were very few papers this year, but I was spoilt for choice over the dies. I decided upon these three multi-dies

and I couldn't resist these ones either!

Of course when I saw this stamp I had to buy it! :)

Nothing whatsoever to do with papercrafts, but I will have fun with these. I expect Fay will be interested in playing with them too!

I was very inspired by this stand.

I have purchased stamps from this trader before and this time I bought these stamps as I liked the display cards that had been made using them.


Yesterday, inspired by the display cards, I played with my stamps and as a reminder to myself I took photos of each stage and I thought I would share them with you.
Deer Scene Card
Using the branch stamp from the Oriental Blossom Set and black ink, create a circular frame using the ink once - stamp three times method. This is a favourite method of mine as it is so simple, yet very effective. I used a roll of sellotape as a guide, but this would be rather large for a card.

Next using the small tree stamp and waste paper as a mask, stamp the background

in two layers with Versa Color Atlantic, again with the ink once - stamp three times method.

In black, stamp two deer in the foreground and a bird on the branch. Clean the deer stamp and stamp two more deer in blue in the background - I stamped onto waste paper first to remove most of the ink from the stamp so that these deer look further away in the picture.

Using glue and glitter create drifts of snow to form hills.

Owl Card
This card was made using the same methods as above, but this time I cut out a small oval as a guide for the centre.

Mask and stamp the scene again.

Make the background fainter by first stamping onto waste paper.

Create three layers this way.


In black stamp the owl and bird from the above kits and then add the glitter to form the snowy hills.

Finally, I used this glue pen (but I wouldn't recommend it as it often leaks) and some glitter to decorate the twigs with snow and icicles.

The finished card.

Oriental Blossom Card
This card is 14cm square. Cut a small circle from card as a guide for the centre and then stamp the twigs as before. Next colour outside of the twigs using Distress Ink Peeled Paint.

Using the leaf stamp and Versa Color Bamboo stamp leaves onto the twigs and the surround. Again I used the ink once - stamp three times method.

Next stamp the butterfly in Versa Color Boysenberry

and continuing with the same colour stamp the twigs with one of the flower stamps. This time I inked once and stamped twice.
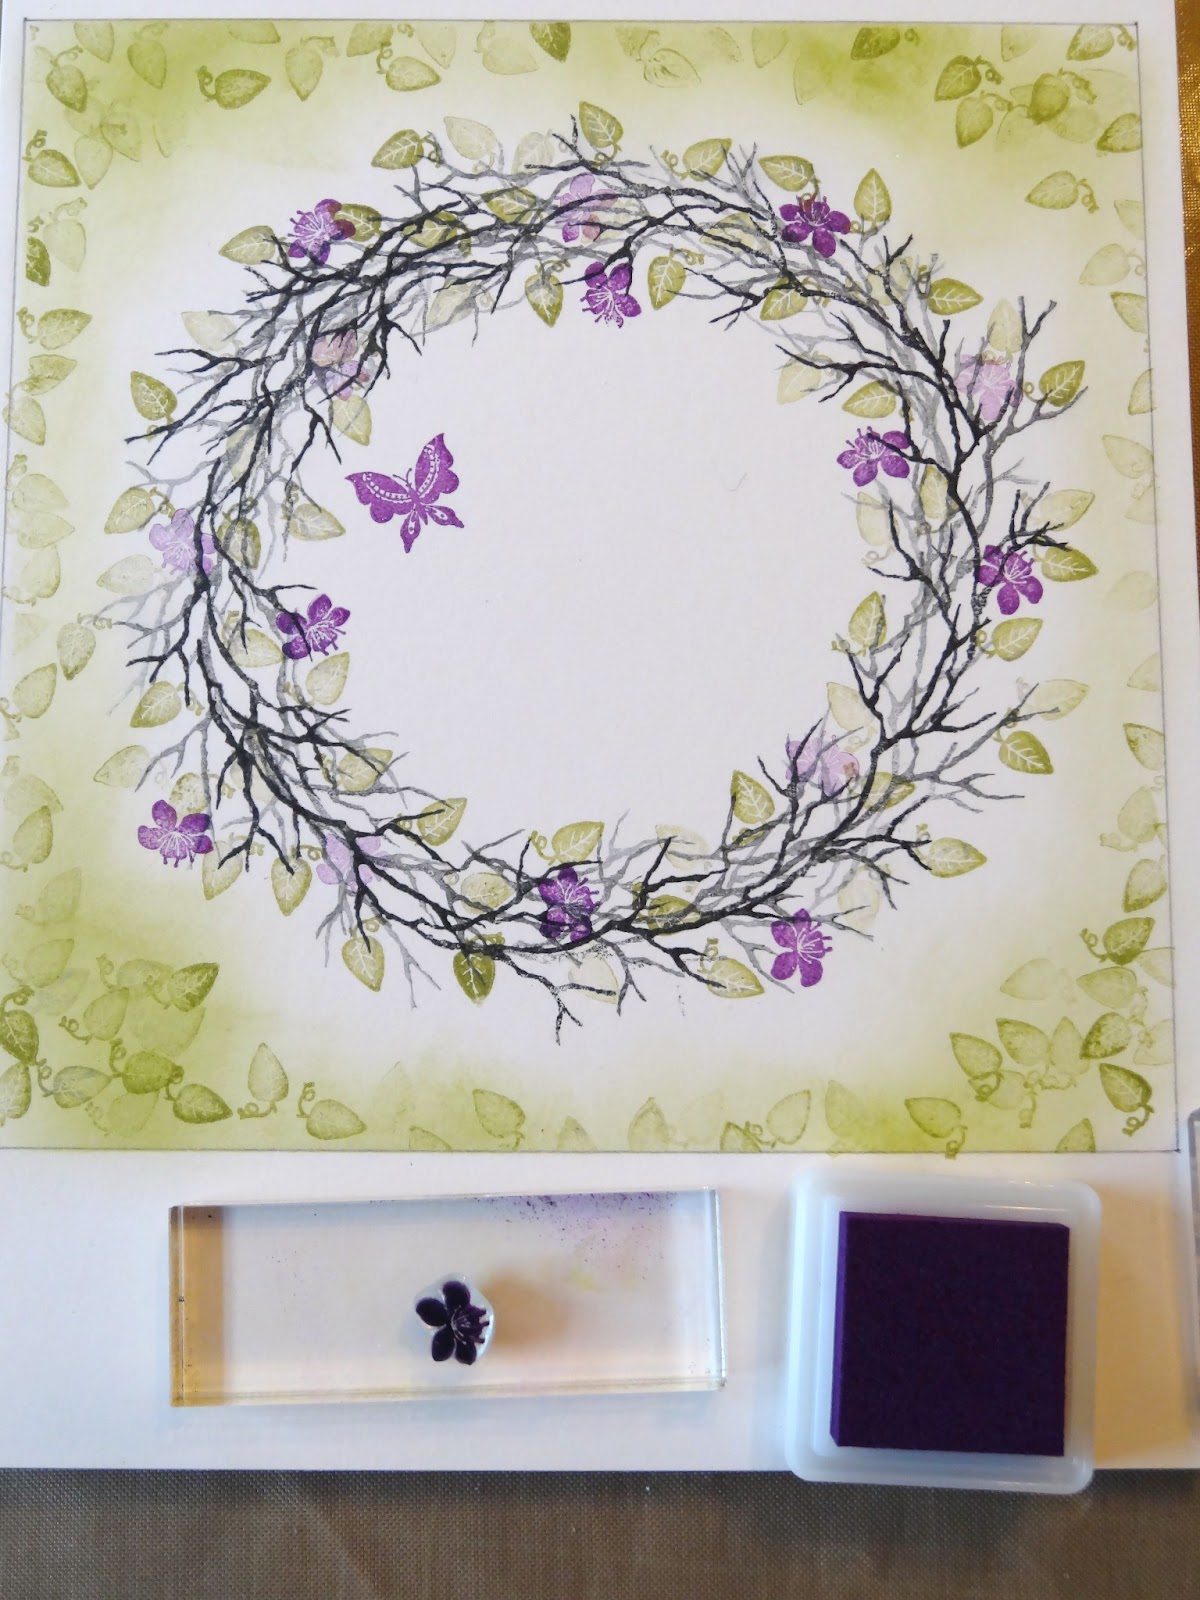
Repeat with the other flower in Versa Color Peony, inking once - stamping twice.

In black pen, create the butterfly's path with dots and add some dotty flourishes around the twigs. I used Enamel Accents in white for flower centres.

Using the same fine pen, draw a border.

Snow Globe Card
Using this set, stamp the snow globe in black onto a separate piece of card, that is smaller than the finished card.

Using a scalpel cut the "glass" out. Draw a border around the globe in black and around the main part of the card.

Line the two pieces of card up and mark where the "glass" is. Stamp this area up as before. This time I used Versa Color Polar Blue for the trees

and Versa Color Charcoal for the deer, fence and church. (Next time I would mask part of the church so that it isn't over the top of the tree! I re-inked the tree to try and cover up my mistake!)

For the "glass" cut a circle from a sheet of clear plastic (mine was saved from a Christmas card box) and glue it to the reverse of the snow globe. Decorate this side with glitter and using glue pads attach it to the main card.

Stamp holly leaves in Versa Color Atlantic onto the globe base and decorate with Distress Markers and Enamel Accents. Finally in black stamp Merry Christmas.

Mini Card
I think this would be a great card for a boy's birthday or maybe even for Father's Day. I used Distress Markers Faded Jeans, Barn Door, Pumice Stone, Old Paper and Tumbled Glass for the Mini. I have a brush that you fill with water that I used to "colour" the car, but a fine paintbrush would work as well.

The hearts are cut from our Valentine's envelopes, using one of my new dies and the Mini logo was on the top of a letter I received yesterday.

Easter Bunny Card
My final card is made using the branch stamp from one of the above kits with Versa Color Bark, inking once - stamping three times. Next, using the same method, stamp the leaves in Versa Color Bamboo. This stamp and the flower and egg stamp are Tapestry stamps that I already had.

Inking once and this time stamping once, use Versa Color Ash Rose to stamp flowers inside the twigs and Versa Color Cyan to stamp the eggs outside and over the twigs. The bunny is cut from plain card using a Tim Holtz die and the gingham created with the Tumbled Glass Distress Marker, edged in Stormy Sky. The bow is coloured in Milled Lavender and Dusty Concord Distress Markers, edged in Dusty Concord. Best Wishes is stamped in Versa Color Pinecone and bunny is grounded with Distress Marker Shabby Shutters and my water brush. Finally add a border in dark brown. All the borders are drawn using Staedtler Fineliners.

Phew, that was a long post! If you got to the bottom of it, thank you for sticking with me. As you can see I got rather carried away! :) Best wishes, Pj x
2 comments:
These cards are quite beautiful.
Joy xx
Thank you Joy. Pj X
Post a Comment